Integrating DayBack with Your FileMaker File(s)
Overview
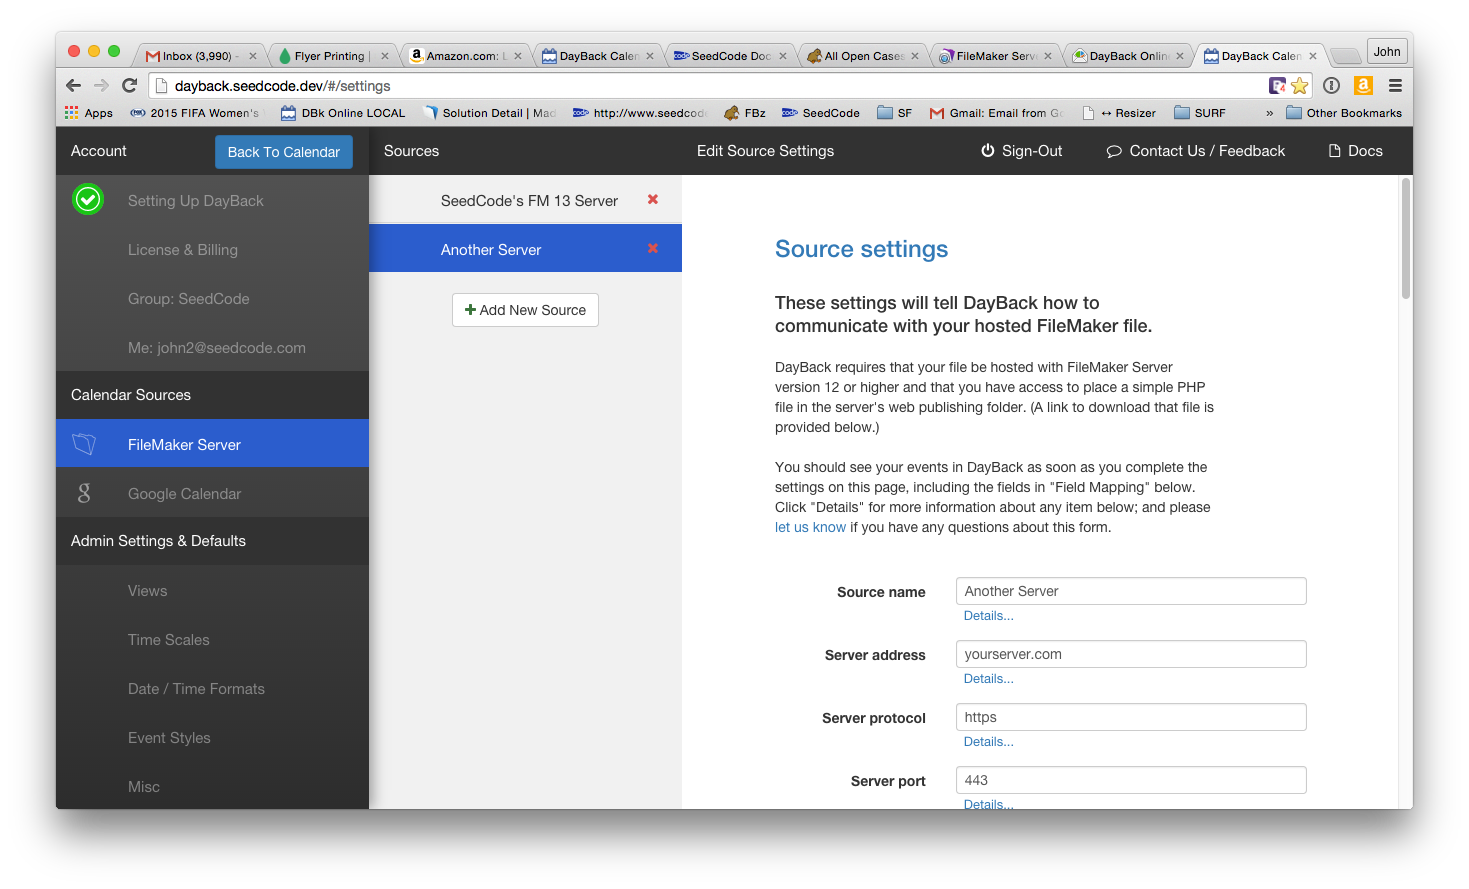
Configuring DayBack Online to work with your FileMaker Server is done almost entirely by filing out a form in DayBack's settings screen. If you're using DayBack for FileMaker you already have the required FileMaker fields and layouts and this will go very quickly: see what we mean in this quick video:
If you're using another FileMaker file, the settings form will describe a couple of fields you'll need to add to your FileMaker table, as well as a layout you'll add to your file. The video above is still a nice overview of what this entails =)
Logging in as an admin
If you created your own DayBack Online account you're already an administrator and clicking on "Settings" in the calendar's left hand side bar will reveal an "Administrator Settings" button that will let you configure sources.
If you're logging in to our demo using "[email protected]" you're not an admin of that account and won't be able to configure a the FileMaker connection there. (We wouldn't want you publishing your FileMaker events to all our demo users.) You can create your own account here: https://app.dayback.com/#/sign-up
Finally, if someone invited you to join their DayBack group they can decide to make you an admin of the group or not: ask them nicely.
Configuring your FileMaker table as a calendar source
Once you arrive at Admin Settings, you'll see "Calendar Sources" in the left hand side bar. Click "FileMaker Server" and then the button to add a new source (you can also edit an existing source if one is already there).
Follow the instructions in the right half of the screen and you'll be up and running shortly. Please get in touch if you have questions.
Thanks!


